


How to create and set up Office 365 & Outlook 365 email signatures
19 November 2025
0 min read
Managing email signatures in Microsoft 365 (Office 365) sounds simple until you need every user to follow the same standard. Between different devices, Outlook clients, and user-controlled settings, keeping Office 365 email signatures consistent is harder than most IT teams expect.
 Whether you’re migrating to Microsoft 365 or already running it across your organization, you still need a reliable way to ensure every employee uses a clear, professional Outlook 365 signature. That matters for branding, legal compliance, and day-to-day efficiency.
As an IT admin, you have three practical options:
User-controlled signatures: Created manually in Outlook. Quick for individuals, impossible to manage at scale.
Microsoft Transport Rules: A centralized method, but limited and hard to maintain.
Exclaimer: A purpose-built solution that automates and standardizes Office 365 signatures across every device.
Who this guide is for
This guide is designed for anyone responsible for creating, managing, or standardizing Office 365 email signatures across an organization. It’s especially useful for
IT administrators who need a consistent, scalable way to control signatures across Outlook desktop, Outlook on the web, the new Outlook, and mobile devices.
Microsoft 365 admins who manage Exchange Online, mail flow rules, and Entra ID data.
Marketing and brand teams working with IT to maintain consistent signatures.
Compliance or legal teams needing reliable disclaimers.
If you’re using Microsoft 365 and need a dependable way to manage Outlook 365 signatures for your entire organization, this guide covers every option and the most effective path to centralized control.
Quick guide on how to create an Outlook email signature in Office 365
- Open Outlook 365 and go to Settings.
- Select Accounts > Signatures.
- Select New Signature and add your contact details.
- Format the layout and insert your company logo or branding elements.
- Set when the signature should appear—new messages, replies, or both.
- Save your changes and send a test email to confirm everything displays correctly.
Types of Office 365 email signatures
There are several ways to create and manage Office 365 email signatures, and each method works differently depending on the device, Outlook client, and level of control your organization needs. Understanding the differences helps you choose the right setup for your environment.
User-created signatures in Outlook 365
Users can create their own signatures in Outlook desktop, Outlook for Mac, the new Outlook, or Outlook on the web. This is fine for individuals but inconsistent across an organization. Each device stores its own version, so formatting and branding vary from user to user.
Outlook on the web signatures
Outlook on the web (OWA) provides a simple editor where users can design and assign a signature. It applies only when sending from the browser and does not sync to other Outlook clients.
New Outlook vs. Classic Outlook
Microsoft now offers two versions of Outlook for Windows:
Classic Outlook allows full signature creation with local storage.
New Outlook uses cloud-stored settings but still lacks the consistency needed for companywide branding.
These differences often confuse users and lead to multiple versions of the same signature.
Office 365 signatures via mail flow rules
Mail flow rules in the Exchange admin center let admins append text or HTML to outbound messages. This works as an organization-wide footer, but it’s limited and doesn’t behave like a true email signature, especially in replies or long threads.
Centralized signatures using Exclaimer
Exclaimer provides server-side and client-side control over Outlook 365 signatures, ensuring the correct signature appears on every email regardless of device, client, or platform. Design, updates, and targeting are all managed centrally, with no user involvement needed.
Outlook signature best practices
A clear, consistent Office 365 email signature helps your emails look professional on every device. Here are the essentials:
Keep it simple: Focus on the information people actually need: your name, job title, company, and key contact details. Avoid clutter or long taglines.
Use readable, professional fonts: Stick to safe, cross-platform fonts such as Arial, Calibri, or Verdana. These display reliably across Outlook 365, mobile clients, and other mail apps.
Add social links only when useful: If you include social media icons, make sure they point to active, professional profiles. Remove anything outdated.
Optimize images: Use a high-quality logo that’s compressed to a reasonable size. Large images slow down email load times and cause rendering issues across Outlook clients.
Check mobile responsiveness: Test your Outlook 365 signature on desktop, web, and mobile. Layouts that look fine on Outlook desktop can break on smartphones.
Standardize across the team: If you're managing signatures for a department or entire organization, create a single Office 365 signature template. Consistency makes a noticeable difference in branding and reduces support requests.
HTML best practices for Office 365 email signatures
Outlook and Microsoft 365 are strict about how they handle HTML. If the code isn’t kept simple, Office 365 email signatures are more likely to break, especially across different devices and mail clients. These practices will help keep layouts stable.
Use tables for layout, not divs
Build your Outlook 365 signature using HTML tables.
Avoid div-based layouts, floats, and complex positioning.
Keep table structures simple (one main table, with a few nested cells if needed).
Keep styling inline
Use inline CSS on individual elements (for example, <td style="font-size:12px; line-height:16px;">).
Avoid external stylesheets and <style> blocks where possible.
Don’t rely on modern CSS features — many aren’t supported in Outlook.
Use safe fonts and clear sizes
Stick to standard fonts such as Arial, Calibri, Verdana, or Times New Roman.
Set explicit font sizes in pixels rather than percentages or em units.
Limit color usage and maintain strong contrast for accessibility.
Host images externally over HTTPS
Store logos and banners on a secure web server and reference them with full HTTPS URLs.
Avoid large file sizes — keep individual images as small as practical.
Use standard formats such as PNG or JPEG.
Set fixed image dimensions
Add width and height attributes to all images to prevent layout jumps.
Match HTML dimensions to the actual file dimensions to avoid distortion.
Use alt text on each image for accessibility and cases where content is blocked.
Avoid background images and complex effects
Don’t use CSS background images, gradients, or overlays — Outlook often ignores them.
Stick to solid background colors and simple borders instead.
Control line spacing and alignment
Set line-height explicitly on text elements.
Use <br> sparingly to avoid oversized gaps.
Align content within table cells rather than relying on global styles.
Keep code lean and consistent
Remove unnecessary tags, comments, and nested tables where they aren’t needed.
Test the same HTML across Outlook desktop, Outlook on the web, and major mobile clients.
Save a clean master version of the HTML so it’s easy to update later.

Create a new email signature in Outlook (user-controlled)
If you only need a simple O365 signature for one user, Outlook’s built-in settings are usually enough.
- Open Outlook on your Windows device from the Start menu or taskbar.
- In Outlook, choose one of the following paths:
- Click File > Options > Mail > Signatures…
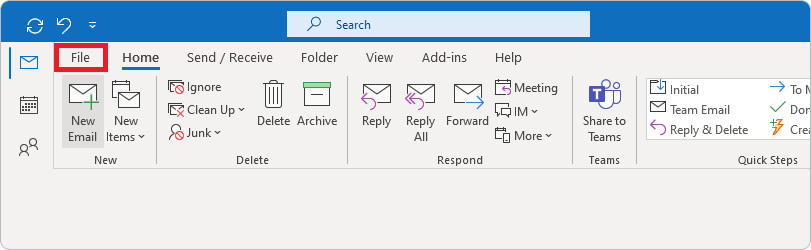
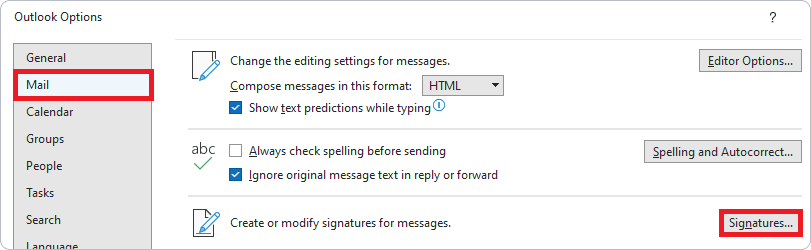
- Open a new email and select Signature > Signatures…

- Click File > Options > Mail > Signatures…
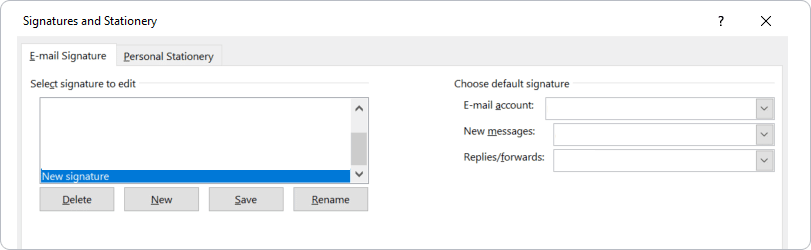
- The Signatures and Stationery window will appear. Under Choose default signature, make sure the correct email account is selected. Choose default signature:
- Under Select signature to edit, click New and give your signature a clear name. This helps if you manage more than one Outlook 365 signature.
- In Edit signature, add your details. You can adjust the font, text size, colors, alignment, and layout as needed.
- For advanced formatting—such as tables, borders, or bullet lists—build the layout in Microsoft Word first, then paste it into the Edit signature box.
To insert a logo or image, select the Image icon and upload your file.
- Choose when Outlook should apply the signature: new messages, replies, forwards, or all three.

- Click OK to save your email signature. Outlook will now include your new Office 365 email signature automatically in outbound messages.
How to add images to Outlook email signatures
Images can strengthen your Office 365 email signature by reinforcing your brand or highlighting a campaign. Most organizations use a company logo, and some add a small banner to promote an event or update.
To add an image to an Outlook 365 email signature, follow these steps:
Open the Signatures tool
In classic Outlook: go to File > Options > Mail > Signatures…
In the new Outlook: go to Settings > Accounts > Signatures
Select the signature you want to edit
Choose an existing signature from the list.Insert your image
In the editor, select the Image icon. Choose your file from the Image Finder window and click Insert.
Once the image is in place, you can resize it:
Right-click the image and select Picture
Go to the Size tab and adjust the dimensions. Keep Lock aspect ratio enabled so the image maintains proper proportions—especially important for company logos.
How to add a signature in Outlook for Mac
Open Outlook for Mac.
In the top menu bar, select Outlook > Preferences.
Under the Email section, choose Signatures.
Click the + button to create a new signature. Give it a name and customize it in the editor.
Use the drop-down menus for New messages and Replies/forwards to choose when Outlook should apply your signature.
Close the Preferences window to save your changes.
How to add a signature on Outlook 365 mobile
You can create a basic Outlook 365 email signature on the mobile app for both Android and iOS. The options are limited compared to the desktop versions, but it’s still useful for adding essential contact details when you’re away from your workstation.
Open the Outlook 365 app on your iOS or Android device.
Tap the Settings icon (the gear symbol).
Select Signature from the menu.
Enter the text you want to use as your mobile email signature.
Tap the checkmark in the top-right corner to save and apply your changes.
The Outlook mobile apps only support plain text, so images, logos, social icons, and advanced layouts aren’t available. Most users stick to a simple, readable block of information, such as:
Example of a mobile Outlook 365 signature:Job title
Company name
Street address, ZIP code
Business phone number
Email address
This gives recipients the core information they need and acts as a practical placeholder until you can use your full desktop or web-based Office 365 email signature.
Using Transport Rules to add companywide email signatures in Office 365
Microsoft 365 doesn’t provide a central place to manage every user’s email signature. By default, each person is responsible for creating their own Outlook 365 signature, which quickly becomes unmanageable when you have hundreds or thousands of mailboxes.
 Transport Rules in the Exchange admin center offer a built-in way to apply a basic, organization-wide Office 365 email signature. These rules let admins append a standard footer or disclaimer to outbound messages, creating a level of consistency without relying on manual setup across devices.
Transport Rules are useful for simple scenarios, but they have clear limitations. They can’t place a signature directly under the latest reply, don’t support mobile consistency, and offer little design flexibility. For teams that need reliable branding, legal disclaimers, or multi-device control, they’re often not enough.
What you need to create an Office 365 email signature
Before we get started, make sure you have the following:
An active Office 365 (Microsoft 365) subscription
Admin access to your tenant
A modern web browser such as Microsoft Edge or Google Chrome
(Optional) An HTML editor if you’re designing a coded signature template
How to create and set up an Office 365 email signature using mail flow rules
Create your default signature layout in HTML or plain text. For tips on what to include, read How to Write Professional Email Signatures.
Add any required Entra ID (Azure AD) attributes (for example: %%DisplayName%%, %%FirstName%%, %%PhoneNumber%%).
Save the completed template as a .txt file.
Go to https://portal.microsoftonline.com and sign in.
Open the Admin app from the Microsoft 365 homepage.
Select Exchange to open the Exchange admin center.
In the left menu, choose Mail flow, then Rules.
Select Add (+) and choose Create a new rule…
Name your rule and click More options…
Under Apply this rule if…, choose the condition you want—for example, “The recipient is external.”
Under Do the following…, select Apply a disclaimer > append/prepend a disclaimer.
Choose Enter text… and paste in the signature from your .txt file.
Set a fallback action: Wrap, Ignore (recommended), or Reject.
Click OK, then Save to activate the rule.

How to set an automatic Outlook 365 email signature
Office 365 mail flow rules can automatically append text to all outbound messages. This gives you a basic way to add an automatic Outlook 365 email signature, but it’s still limited. Mail flow rules provide a basic automatic signature, but they still don’t control placement in replies or support more advanced layouts.
Still, if you need a simple, tenant-wide signature, here’s how to set it up.
Steps to use mail flow rules for automatic signatures
Go to the Microsoft 365 Admin Center and open Exchange.
In the left-hand menu, select mail flow.
Click the + symbol and choose Apply disclaimers…
Enter a clear name for the rule in the Name field.
Under Apply this rule if…, choose:
Sender is…
Inside the organization
Select All recipients inside your organization if you only want the signature applied to internal senders.
In Add a disclaimer…, select Enter text… and paste your plain text email signature template.
Click Save to activate the rule.
Once enabled, Microsoft 365 will append the disclaimer-style signature to all messages that match your rule.
Common Office 365 email signature problems and how to fix them
Even when everything looks set up correctly, Office 365 email signatures can behave unpredictably across Outlook clients, devices, and mail flows. Below are the most common issues IT teams encounter and how to resolve them quickly.
1. Signature not appearing in Outlook 365
If users can’t see their signature while composing an email, check the following:
They may be using the new Outlook, which handles signatures differently than classic Outlook.
Cloud signatures may not be enabled for their account.
Cached settings sometimes prevent Outlook from loading the latest version—restarting the app often resolves this.
Fix: Confirm which Outlook client the user is running and ensure their signature is assigned in the correct settings panel.
2. Images show as attachments or display a red “X"
Transport Rules allow some HTML, but the experience is inconsistent.
When adding images and links:
Images must be hosted online—embedded images aren’t supported.
Recipients may see a red “X” until content is downloaded.
On mobile devices:
Many mobile clients send messages in plain text, removing your HTML signature entirely.
Formatting tricks (such as bold or italics) may preserve HTML, but results vary.
Fix: Host images over HTTPS and use absolute URLs. Embedded images work in Outlook desktop but not consistently across all mail clients—server-side tools avoid this issue entirely.
3. Signature disappears on replies and forwards
By default, Outlook only inserts signatures on new messages unless users manually apply them. This often results in replies being sent without a footer.
Fix: Instruct users to set their reply signature under their Outlook signature preferences or apply it manually using the Signature dropdown.
4. Signature formatting breaks on mobile
Outlook mobile apps send messages in plain text by default, stripping out styling such as:
Tables
Font colors
Inline images
HTML layouts

Fix: Mobile users should use a simplified signature, or organizations should use a centralized solution that applies the signature after the email leaves the device.
5. HTML code looks different after sending
Outlook modifies HTML to match its rendering engine. This often changes:
Line spacing
Table widths
Font sizes
Margins and padding
Fix: Use table-based layouts with inline CSS only. Avoid background images, divs, or complex styling that Outlook won’t support.
6. Signatures show blank fields for some users
When signatures rely on user data from Azure AD or Entra ID, missing fields cause empty lines and layout gaps.
Fix: Ensure directory information is complete or use conditional logic that hides empty fields.
7. Mail flow rule signature appears at the bottom of the entire thread
Because Transport Rules behave like disclaimers, signatures are appended to the very end of the full conversation.
Fix: There is no native fix. Microsoft 365 doesn’t support “under the latest reply” placement via mail flow. Only client-side signatures or dedicated platforms can control placement.
For more details, visit the official Microsoft documentation.
Choosing Exclaimer for Office 365 email signature management
Managing and standardizing email signatures across Office 365 is harder than it looks. Native tools are limited, time-consuming, and don’t scale well across devices, departments, or global teams. That’s why so many organizations choose Exclaimer.
 With Exclaimer, you can create professional email signatures for Office 365 users from one central platform. There’s no HTML to write and no need for IT involvement. Anyone you approve can design and publish signatures using a simple drag-and-drop editor.
You can add logos, banners, social media icons, user photos, and any other visual elements your brand requires. Updates are handled through clear, rule-based assignments, so the right signature is applied automatically based on department, location, or other attributes.
User details are pulled directly from Entra ID (Azure Active Directory), including any custom fields you’ve set. If a field is missing for a user, Exclaimer hides it automatically—keeping every layout clean and consistent without manual fixes.

Compare Exclaimer with Office 365 email signature features
Native Office 365 options—Outlook’s signature settings and Transport Rules—can handle simple scenarios, but they fall short when you need control, consistency, or automation at scale. Exclaimer fills those gaps with centralized management, reliable branding, and rule-based deployment across every device and email client.
The table below shows how Exclaimer compares with Outlook’s built-in tools and mail flow rules.
| Features | Exclaimer | Outlook Settings | Mail Flow |
|---|---|---|---|
| Centrally control Office 365 signatures for everyone | ✓ | ✗ | ✓ |
| Support compliance with a bespoke disclaimer applied to every email sent | ✓ | ✗ | ✓ |
| Automatic synchronization of user information to popular signatures from Active Directory | ✓ | ✗ | ✓ |
| Assign signatures to different teams or individual senders | ✓ | ✓ | ✓ |
| Ensure brand consistency on all emails | ✓ | ✗ | ✓ |
| Multiple user logins allow IT to delegate access to non-technical users to create and update signatures | ✓ | ✗ | ✗ |
| Create professional signature designs using a drag and drop editor | ✓ | ✗ | ✗ |
| Access professionally created examples of email signature designs that can be updated with your brand | ✓ | ✗ | ✗ |
| Email signatures applied to emails from all mobile devices and email clients | ✓ | ✗ | ✗ |
| Users can see their signature while composing an email | ✓ | ✓ | ✗ |
| Signatures can be seen in a user’s Sent Items folder | ✓ | ✓ | ✗ |
| Apply signatures under the most recent reply | ✓ | ✓ | ✗ |
| Establish shorter signatures for reply emails | ✓ | ✓ | ✗ |
| Hide contact sections with blank attributes | ✓ | ✓ | ✗ |
| Let users self-manage specific fields used to populate signatures, including custom information | ✓ | ✗ | ✗ |
| Incorporate embedded images and user photos in your signatures | ✓ | ✓ | ✗ |
| Include clickable promotional banners in your designs | ✓ | ✓ | ✓ |
| Apply content above the email message body for maximum impact | ✓ | ✓ | ✗ |
| Segment signatures for internal/external emails and exclude individual users or groups | ✓ | ✗ | ✓ |
| Create signatures for specific audiences based on email domain | ✓ | ✗ | ✓ |
| Apply a signature during a defined date range | ✓ | ✗ | ✗ |
| Establish a signature for a repeatable campaign that follows enhanced scheduling rules | ✓ | ✗ | ✗ |
| Monitor, analyze, and report on email signature usage | ✓ | ✗ | ✗ |
| Measure signature effectiveness incl. clickthroughs and A/B testing | ✓ | ✗ | ✗ |
| Apply one-click signature surveys | ✓ | ✗ | ✗ |
| Integrate with CRM platforms like Salesforce & HubSpot | ✓ | ✗ | ✗ |
| Display your latest social posts on Facebook & LinkedIn | ✓ | ✗ | ✗ |
| Centrally update brand assets from one hub | ✓ | ✗ | ✗ |
| Use email signatures with Microsoft 365 and on-premises Exchange | ✓ | ✓ | ✗ |
Examples of using Exclaimer for Outlook 365 email signature management
Below are examples of the types of Outlook 365 email signature templates you can create using Exclaimer. Each one can be assigned automatically based on department, role, location, or campaign needs—without any manual updates from users.
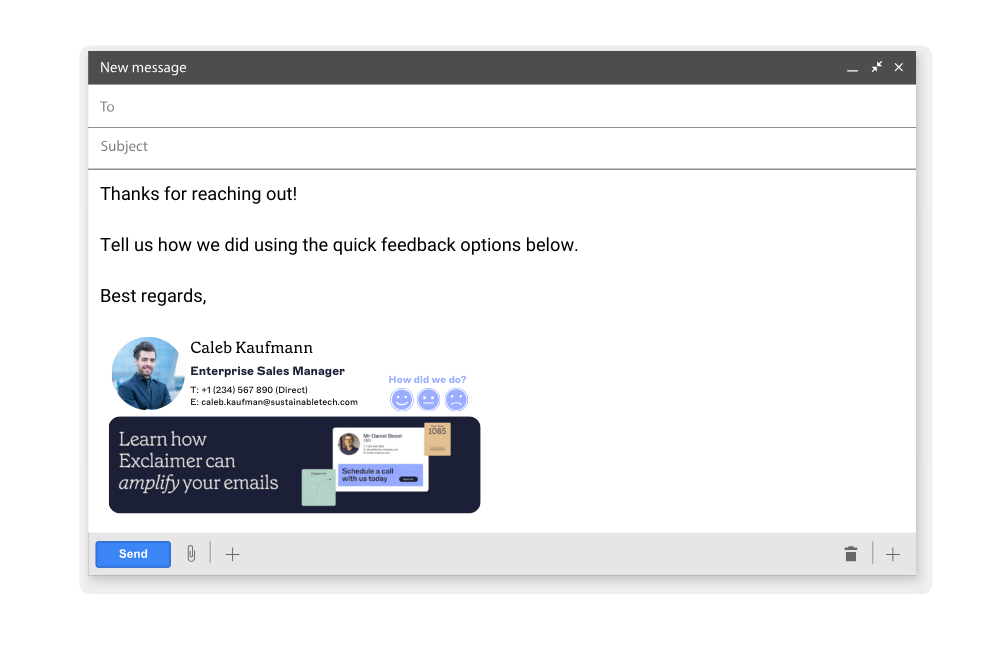
1. Outlook email signature template for marketing
 Email signatures are an effective place to support ongoing campaigns. With Exclaimer, you can:
Add promotional banners and rotate them on a schedule
Personalize content based on recipient or sender
Test different versions using A/B variations
Track click-through rates directly in the analytics dashboard
Quality imagery and clear messaging make the biggest impact, and updates can be deployed instantly across your entire organization.
2. Real estate email signature template
 Real estate teams rely on timely, relevant content. Exclaimer allows you to tailor signatures based on the conversation:
For sellers: Highlight recent sales performance, market statistics, or success metrics
For buyers: Showcase active listings, property images, or links to brochures
Templates are easy to update as properties change, and content can be segmented for different audiences.
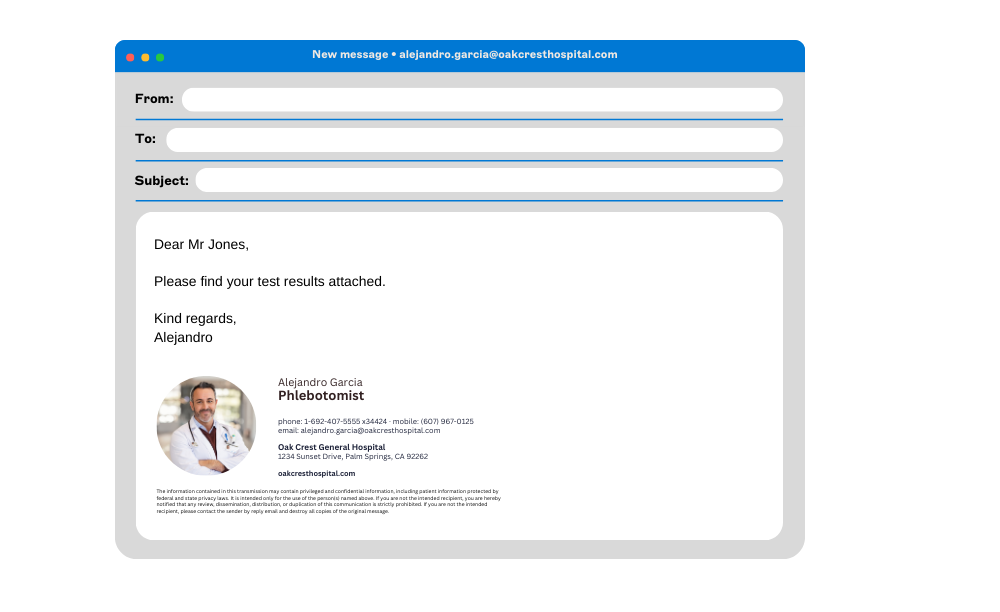
3. Doctor email signature template
 In healthcare, trust and clarity matter. Exclaimer helps medical practices and hospital teams create consistent, professional templates that include:
A clinician’s headshot
Qualifications and specialisms
Links to programs, guidance, or booking pages
These signatures reinforce credibility and make it easier for patients to take action.
4. Mobile email signature templates for Outlook
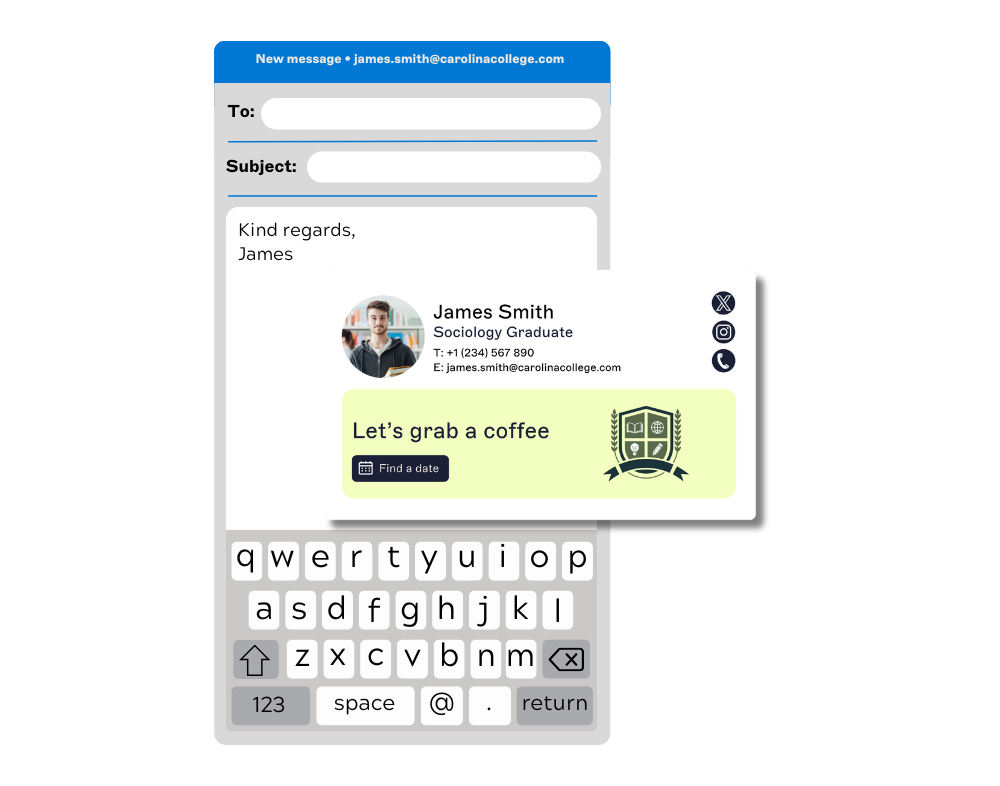 Over half of all emails are opened on mobile devices, so signatures need to display correctly everywhere. Exclaimer ensures every Office 365 email signature renders properly on smartphones and tablets, regardless of the device or mail client.
Choose the best way to manage Office 365 signatures
Microsoft 365 makes it easy for individuals to add a basic email signature, but the built-in tools limit what organizations can do at scale. Outlook settings and mail flow rules work for simple cases, yet they fall short when you need consistent branding, controlled updates, or signatures that work across every device.
 Exclaimer's Office 365 email signature management solution gives you centralized control, clear governance, and fully customizable designs—all without relying on users or writing HTML. You can update multiple signatures from one place and ensure every email sent from your Microsoft 365 domain looks consistent and professional.
If you want a reliable way to create, assign, and maintain Office 365 email signatures across your entire organization, Exclaimer is the most effective option.
Start enhancing your email communication today by signing up for a free trial or booking an online demonstration of our purpose-built Office 365 email signature solution.