


How to set up automatic replies in Outlook Office 365
21 November 2025
0 min read
TL;DR
- Automatic replies can be set in Outlook on the web, Outlook desktop, or through the Exchange admin center
- Admins can configure replies for any user or shared mailbox directly in the EAC
- Shared mailboxes should have replies set in the EAC for consistent behavior
- Use transport rules or PowerShell for conditional or bulk automated responses
- If replies aren’t working, check external reply settings, mailbox rules, and shared mailbox configuration
Automatic replies let Outlook and Office 365 send messages on your behalf when you’re unavailable. They’re most often used for out-of-office notifications, but they can also confirm receipt of messages, direct people to shared inboxes, or explain response delays during busy periods.
In Microsoft 365, automatic replies can be set by individual users or configured centrally by IT admins. The behaviour depends on where the reply is created—Outlook on the web, Outlook desktop, or the Exchange admin center. Each option handles timing, internal and external messages, and rule-based automation slightly differently.
Automatic replies help keep communication consistent when teams aren’t available, but the setup process varies across mailbox types and admin permissions. The sections below walk through each method step by step.
The main reasons to use auto replies
Automatic replies are useful whenever you need to set clear expectations about response times. Most people use them for annual leave or public holidays, but they’re also effective in day-to-day operations. There are several reasons for using auto responses in Outlook for Microsoft 365.
Common use cases include:
Planned absence: Annual leave, parental leave, training days, or company-wide shutdowns.
Short-term unavailability: Meetings, travel, or periods where inbox monitoring is limited.
Shared mailboxes: Letting customers or internal teams know their message has been received and when they can expect a reply.
High-volume periods: Seasonal peaks, support backlogs, or situations where teams can’t respond at normal speed.
Routing messages: Directing people to alternative contacts, service desks, or ticketing systems when the primary mailbox isn’t monitored.
Configured correctly, automatic replies reduce uncertainty, lower follow-up volume, and help teams maintain a predictable communication experience, even when someone isn’t available.
By complementing them with professional email signatures, your business emails can become powerful drivers of engagement, amplifying your messages and expanding your reach.
Top tips for creating effective auto responses
To ensure that your auto responses are effective and professional, here are some tips to keep in mind:
Keep it concise and clear: Auto responses are like snippets, so keep them concise and clear. Make sure recipients understand the message without feeling overwhelmed.
Use a friendly and professional tone: Auto responses should embody the unique tone of your brand or organization. It's crucial to strike a balance between friendliness and professionalism, even in automated messages.
Include relevant information: Ensure that your auto response includes all the essential information, such as alternative contact details and the reason for your absence. This facilitates smooth communication and provides the sender with an alternative means of reaching your organization.
Don't forget to turn it off: When you return to work, remember to switch off your auto-reply. This ensures clarity and prevents any unnecessary or confusing responses from being sent.
How to set up automatic replies in Outlook on the web
Outlook on the web gives users the most straightforward way to turn on automatic replies. The feature sits in the mailbox settings and supports scheduled time ranges, internal/external messages, and simple routing instructions.
Open Outlook on the web
Go to https://outlook.office.com and sign in with your Microsoft 365 account.Open Settings
Select the Settings icon in the top-right corner, then choose View all Outlook settings.Go to Automatic replies
Navigate to Mail > Automatic replies.Turn on automatic replies
Enable Automatic replies on.Optionally set a start and end time so replies activate and stop automatically.
If you don’t set a timeframe, the reply stays active until you switch it off manually.
Write your messages
Add the reply you want internal users to receive. If you want a different message for external senders, select Send replies outside your organisation and enter the text.Choose optional settings
Outlook on the web also allows you to:Block out your calendar for the selected period
Decline new meeting invitations
Decline and cancel existing meetings during the timeframe
Save your changes
Select Save to apply the settings.
Automatic replies start immediately unless you’ve scheduled a specific date range.
How to set up automatic replies in Outlook desktop
Outlook desktop includes its own automatic replies feature. It works the same way as Outlook on the web but uses a different menu path and interface. This method is useful for users who spend most of their time in the desktop app.
Open Outlook
Launch the Outlook desktop application and sign in if required.Open the Automatic Replies menu
Go to File in the top-left corner. Select Automatic Replies (Out of Office).Turn on automatic replies
In the Automatic Replies window, choose Send automatic replies.Set a timeframe (optional)
If you want replies to start and stop automatically, select Only send during this time range and choose the start and end dates.Write your messages
Use the Inside My Organization tab to write the message for internal recipients.
Use the Outside My Organization tab to write a message for people outside your organisation if needed.
Apply and close
Select OK to save and activate the settings.
Automatic replies will run until the end of your specified timeframe or until you return to this menu and switch them off manually.
How to enable auto responses in Office 365
Admins can configure automatic replies for any mailbox directly in the Exchange admin center (EAC). This is useful when a user is unavailable, a shared mailbox needs a standard response, or a department requires consistent messaging.
Follow these steps:
Open the Exchange admin center
Go to https://admin.exchange.microsoft.com and sign in with the relevant admin role (Exchange Administrator or Global Administrator).Go to Mailboxes
In the left-hand navigation, select Recipients > Mailboxes.Choose the mailbox
Select the user or shared mailbox you want to configure. Choose Settings in the right-hand panel.Open Automatic replies
Under Mail flow settings, select Automatic replies.Turn on automatic replies
Enable Automatic replies for the selected mailbox.You can apply the reply indefinitely or
Set a specific start and end time.
Write the reply messages
Enter the internal message.
If a different external message is needed, enable Send replies outside the organization and add the external text.Save the configuration
Select Save to apply the changes.
Automatic replies start immediately unless you’ve scheduled a specific timeframe. Users cannot override admin-configured automatic replies unless you switch them off at the admin level.
How to set up an auto response for a shared Outlook mailbox
Shared mailboxes don’t have their own sign-in, so users can’t set automatic replies themselves. Automatic replies must be configured through the Exchange admin center (EAC) or by using delegated permissions in Outlook on the web.
Method 1: Configure automatic replies in the Exchange admin center
Open the Exchange admin center
Go to https://admin.exchange.microsoft.com and sign in with an admin account.Go to Recipients
Select Recipients > Mailboxes.Find the shared mailbox
Locate the shared mailbox in the list and select it.Open Automatic replies
In the right-hand panel, go to Mail flow settings > Automatic replies.Enable automatic replies
Turn on Automatic replies.Set a timeframe if needed
Or leave it active indefinitely
Add the message content
Enter the internal and external reply text. Most shared mailboxes send the same message to everyone, but separate messages are supported.Save your changes
Select Save to activate the settings.
This is the most reliable way to control auto-responses for shared mailboxes.
Method 2: Configure replies using delegated access (Outlook on the web)
If users have Full Access permissions to the shared mailbox, they may be able to set automatic replies through Outlook on the web.
Open Outlook on the web.
Select your profile photo.
Choose Open another mailbox and select the shared mailbox.
Go to Settings > View all Outlook settings > Mail > Automatic replies.
Turn on automatic replies and add the message content.
Save the changes.
Note: This option isn’t always available, depending on tenant configuration and permission level. The EAC method is more reliable.
How to set automatic replies for another user
IT admins often need to set automatic replies on behalf of users who are unavailable or unable to access their mailbox. This is done through the Exchange admin center (EAC) or by temporarily granting mailbox access.
Method 1: Use the Exchange admin center (recommended)
This is the simplest and most controlled option.
Open the Exchange admin center
Visit https://admin.exchange.microsoft.com and sign in with an Exchange Administrator or Global Administrator account.Go to Recipients > Mailboxes
Locate the user’s mailbox.Open Automatic replies
In the right-hand settings panel, select Mail flow settings > Automatic replies.Enable automatic replies
Turn on Automatic replies.Choose a timeframe if required
Or leave the reply active until turned off manually
Add the reply messages
Enter the internal reply. Add an external reply if needed.Save your changes
Select Save to apply the configuration.
Changes take effect immediately, and users cannot override settings configured at the admin level.
Method 2: Temporarily assign mailbox access
If you prefer to configure the reply in Outlook on the user’s behalf, you can grant access and set it through Outlook.
Option A: Use Full Access permissions
In the EAC, grant yourself Full Access to the user’s mailbox.
Open Outlook on the web.
Select your profile photo and choose Open another mailbox.
Open the user’s mailbox.
Go to Settings > View all Outlook settings > Mail > Automatic replies.
Set the message and save your changes.
Option B: Reset the user’s password (least preferred)
Only used in exceptional cases and should follow internal access policies. Once signed in, configure automatic replies normally, then force a password reset.
To configure automatic replies for someone else, you need one of the following:
Exchange Administrator role
Global Administrator role
Full Access to the specific mailbox
Advanced options for automatic replies
Most automatic replies are set through Outlook or the Exchange admin center. For more complex scenarios, IT teams can use transport rules or PowerShell to create automated responses with specific conditions. These options are useful when messages need to be routed, filtered, or replied to based on defined criteria.
Using transport rules for conditional auto-responses
Transport rules let you create targeted auto-responses based on sender, recipient, keywords, or message type. This is useful for scenarios where standard automatic replies won’t apply.
Common use cases include:
Replying only to messages sent to a specific address (e.g., a campaign inbox)
Sending a confirmation message when users email a monitored mailbox
Returning a structured response when emails contain certain phrases
Creating different auto-replies for internal and external senders
To create a transport rule:
Open the Exchange admin center
Go to https://admin.exchange.microsoft.com.Go to Mail flow
Select Mail flow > Rules.Create a new rule
Choose Add a rule and give it a clear name.Set the conditions
Define the conditions that trigger the auto-response (e.g., sent to a specific mailbox).Add the action
Select Apply a message response and enter the text you want to send.Review and save
Confirm the settings and save the rule.
Note: Transport-rule responses do not support rich HTML formatting. They also apply at the server level, so make sure they don’t conflict with user-level automatic replies.
Using PowerShell for automated replies
PowerShell provides more granular control and is useful for bulk changes or scripted workflows.
Enable automatic replies with PowerShell
First, connect to Exchange Online PowerShell:
Connect-ExchangeOnlineThen run:
Set-MailboxAutoReplyConfiguration -Identity "[email protected]" -AutoReplyState Enabled -InternalMessage "Internal reply text" -ExternalMessage "External reply text"Set a reply with a date range
Set-MailboxAutoReplyConfiguration -Identity "[email protected]" -AutoReplyState Scheduled -StartTime "MM/DD/YYYY 09:00" -EndTime "MM/DD/YYYY 17:00" -InternalMessage "Internal reply" -ExternalMessage "External reply"Disable automatic replies
Set-MailboxAutoReplyConfiguration -Identity "[email protected]" -AutoReplyState DisabledWhen to use advanced configuration
Advanced options are best suited for situations where:
Standard automatic replies don’t meet the requirement
Multiple mailboxes need uniform responses
You need conditional logic for responses
You’re automating mailbox provisioning workflows
You want to manage replies at scale without UI interaction
Troubleshooting automatic replies
Automatic replies in Office 365 usually work without issues, but problems can occur due to mailbox settings, policy restrictions, or conflicting rules. The points below cover the most common causes and how to resolve them.
Automatic replies aren’t being sent
Possible causes:
The feature is enabled in Outlook, but not saved correctly
The reply is only set for internal recipients
The mailbox is hidden from the global address list
External replies are blocked by admin policy
How to fix:
Check the settings in Outlook or the EAC to confirm automatic replies are actually enabled.
Verify Send replies outside your organisation is turned on if external senders are expecting a reply.
Review mailbox properties to ensure the account isn’t hidden.
Check tenant-wide external messaging policies in the Exchange admin center.
Automatic replies only send once
Office 365 limits the number of automatic replies sent to the same external sender within a 24-hour window. This is by design and cannot be adjusted.
How to fix:
Confirm expectations with the user or team.
If repeated responses are required, consider using transport rules instead of standard automatic replies.
Rules conflict with automatic replies
Inbox rules can override or block automatic replies in some cases.
How to fix:
Check the user’s Rules settings in Outlook.
Disable or adjust rules that move messages on arrival, especially rules that redirect mail.
Test without any rules enabled to see if replies start working.
Shared mailbox replies aren’t triggering
This often happens when automatic replies are configured in Outlook instead of the Exchange admin center.
How to fix:
Configure replies directly in the EAC under Recipients > Mailboxes > Mail flow settings > Automatic replies.
Ensure the shared mailbox isn’t set to forward messages, which can bypass the trigger.
Admin-configured replies aren’t updating
If you make changes in the EAC but the automatic reply still shows an older message:
How to fix:
Refresh the mailbox settings page to confirm the update saved.
Wait a few minutes; changes may take a short time to propagate.
Verify there’s no PowerShell script or transport rule overriding the behaviour.
External senders aren’t receiving replies
Possible causes:
External replies disabled in the policy
The sender is on a blocked domain list
DMARC/SPF failures causing mail to be handled differently
Transport rules affecting outbound behaviour
How to fix:
Confirm external replies are enabled in the automatic reply settings.
Check Organization settings > External access.
Review mail flow rules to ensure nothing reroutes or blocks external responses.
Test with a verified external inbox to isolate the issue.
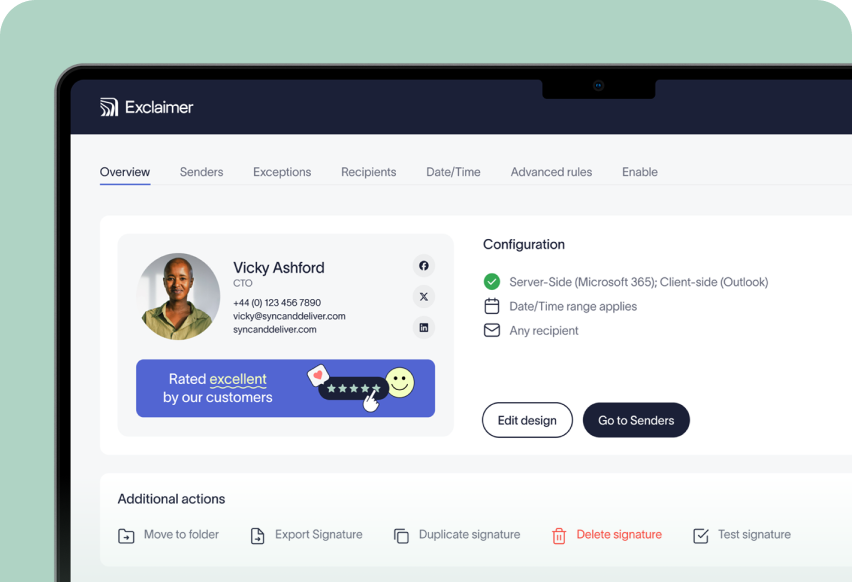
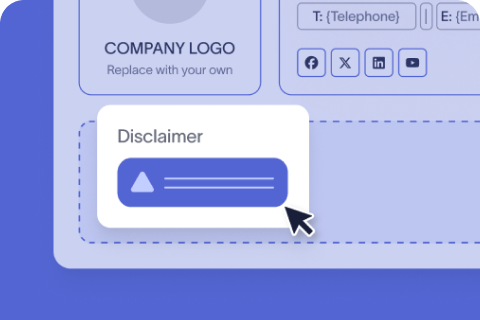
Using auto responses with email signatures via Exclaimer
To ensure professional and cohesive email communication, it is essential to include an email signature in your automated messages. Exclaimer offers a solution that enhances every automated response with an exceptional email signature. With its advanced features, you can effortlessly create and manage personalized signatures for auto responses, maintaining consistency across all your communications.
Whether you're a small business owner or part of a large organization, Exclaimer's powerful platform guarantees that your email signatures will shine on every business email, while adhering to your brand guidelines and legal obligations. Get yourself a free trial.